# ElasticSearch
ElasticSearch是一个基于Lucene的搜索服务器。它提供了一个分布式多用户能力的全文搜索引擎,基于RESTful web接口。ElasticSearch是用Java语言开发的,并作为Apache许可条款下的开放源码发布,是一种流行的企业级搜索引擎。
# 倒排索引
倒排索引是通过单词(或短语)快速定位到包含这些内容的文档列表的索引方式。它是基于内容的单词或短语来组织的,每个单词都对应一个倒排列表(Posting List),列出了包含该单词的所有文档的位置信息。倒排索引的结构较为复杂,需要维护一个词典和多个倒排列表,但在文档更新时只需更新相关的倒排列表,更新操作较为高效。
倒排索引原理
# ES与MySQL的概念对比
| MySQL | ES | 说明 |
|---|---|---|
| Table表 | Index索引 | 索引是相同类型的文档的集合。类比到传统的sql的话,索引的概念近似于sql中的表。 |
| Row行 | Document文档 | ES是面向文档存储的,文档数据会被序列化为json格式的数据存储。类比到传统的sql的话,文档的概念近似于sql中的表数据。 |
| Column列 | Field字段 | Field(字段),就是ES的文档(json字符串)中的字段,类比到Mysql就是数据表中列的概念。 |
| Schema约束 | Mapping映射 | Mapping属性是对索引中文档的约束,常见的Mapping属性有type字段类型属性(属性值有字符串text以及keyword,其中text可分词,keyword不可分词,布尔值,日期,对象),index(是否创建索引,默认为true)。 |
| SQL | DSL | DSL(Domain Specific Language领域特定语言)是es中的增删改查语法。类比到传统的sql的话,对应的就是sql的DDL语句。 |
# 索引库的Mapping映射
索引库的Mapping属性主要有type属性,index属性,analyzer分词器属性,properties子属性字段。
# type
type中常见的类型有字符串,数值,布尔类型,日期类型以及对象类型,其中字符串类型又分为text以及keyword,text指可分词的文本,而keyword则指不可分词的文本(如国家,品牌,ip地址信息)。数值类型可分为long,integer,double,float等。
# index
是否针对某属性创建索引,默认为true。
# analyzer
对某属性使用何种类型的分词器。
# properties
用于定义一个字段的子字段。
# 安装ES及Kibana
# 安装ES
1.拉取镜像
docker pull docker.elastic.co/elasticsearch/elasticsearch:8.1.0
2.启动服务
# 设置环境变量"discovery.type=single-node",这对于单节点的Elasticsearch实例是必要的。
#  -e ES_JAVA_OPTS="-Xms512m -Xmx512m" 指定512m的启动内存,不设置的话默认1G内存启动
docker run -d -e ES_JAVA_OPTS="-Xms512m -Xmx512m" --name elasticsearch -p 9200:9200 -p 9300:9300 -e "discovery.type=single-node" docker.elastic.co/elasticsearch/elasticsearch:8.1.0
3.修改es的默认配置
# 进入容器
[root@VM-24-3-centos ~]# docker exec -it 79d386cecbb5 /bin/bash
# 进入配置目录
elasticsearch@79d386cecbb5:~$ cd /usr/share/elasticsearch/config
# 通过vi指令修改配置,将关键配置xpack.security.enabled: true修改为xpack.security.enabled: false
elasticsearch@79d386cecbb5:~/config$ vi elasticsearch.yml
4.验证安装结果
[root@VM-24-3-centos ~]# curl -X GET http://127.0.0.1:9200/
{
  "name" : "79d386cecbb5",
  "cluster_name" : "docker-cluster",
  "cluster_uuid" : "H8RyVm7WR0iwJjJ07QJP7g",
  "version" : {
    "number" : "8.1.0",
    "build_flavor" : "default",
    "build_type" : "docker",
    "build_hash" : "3700f7679f7d95e36da0b43762189bab189bc53a",
    "build_date" : "2022-03-03T14:20:00.690422633Z",
    "build_snapshot" : false,
    "lucene_version" : "9.0.0",
    "minimum_wire_compatibility_version" : "7.17.0",
    "minimum_index_compatibility_version" : "7.0.0"
  },
  "tagline" : "You Know, for Search"
}
# 安装Kibana
1.拉取镜像
# kibana的版本需要和es保持一致
[root@VM-24-3-centos ~]# docker pull kibana:8.1.0
2.启动服务
[root@VM-24-3-centos ~]# docker run -d -e ELASTICSEARCH_HOSTS=http://139.199.188.50:9200/ --name=kibana -p 5601:5601 -e I18N_LOCALE="zh-CN" --log-opt max-size=100m --log-opt max-file=5 kibana:8.1.0
3.验证安装结果
# IK分词器
es在对文档创建倒排索引的时候需要进行分词,同样的,对于用户的检索条件,es也需要分词。es的默认分词器对中文的支持并不是很好,因此我们需要加装阿里云提供的IK分词器。
我们使用默认的分词器对一段中文进行分词,效果如下:
POST /_analyze
{
  # 分词器
  "analyzer": "standard",
  # 待分词的内容
  "text":"秉持自信而活,世人皆是罪之子"
}

# 分词结果,可以看到这个分词器的结果非常差,每个中文字符都被分成了一个“词”。
{
  "tokens" : [
    {
      "token" : "秉",
      "start_offset" : 0,
      "end_offset" : 1,
      "type" : "<IDEOGRAPHIC>",
      "position" : 0
    },
    {
      "token" : "持",
      "start_offset" : 1,
      "end_offset" : 2,
      "type" : "<IDEOGRAPHIC>",
      "position" : 1
    },
    {
      "token" : "自",
      "start_offset" : 2,
      "end_offset" : 3,
      "type" : "<IDEOGRAPHIC>",
      "position" : 2
    },
    {
      "token" : "信",
      "start_offset" : 3,
      "end_offset" : 4,
      "type" : "<IDEOGRAPHIC>",
      "position" : 3
    },
    {
      "token" : "而",
      "start_offset" : 4,
      "end_offset" : 5,
      "type" : "<IDEOGRAPHIC>",
      "position" : 4
    },
    {
      "token" : "活",
      "start_offset" : 5,
      "end_offset" : 6,
      "type" : "<IDEOGRAPHIC>",
      "position" : 5
    },
    {
      "token" : "世",
      "start_offset" : 7,
      "end_offset" : 8,
      "type" : "<IDEOGRAPHIC>",
      "position" : 6
    },
    {
      "token" : "人",
      "start_offset" : 8,
      "end_offset" : 9,
      "type" : "<IDEOGRAPHIC>",
      "position" : 7
    },
    {
      "token" : "皆",
      "start_offset" : 9,
      "end_offset" : 10,
      "type" : "<IDEOGRAPHIC>",
      "position" : 8
    },
    {
      "token" : "是",
      "start_offset" : 10,
      "end_offset" : 11,
      "type" : "<IDEOGRAPHIC>",
      "position" : 9
    },
    {
      "token" : "罪",
      "start_offset" : 11,
      "end_offset" : 12,
      "type" : "<IDEOGRAPHIC>",
      "position" : 10
    },
    {
      "token" : "之",
      "start_offset" : 12,
      "end_offset" : 13,
      "type" : "<IDEOGRAPHIC>",
      "position" : 11
    },
    {
      "token" : "子",
      "start_offset" : 13,
      "end_offset" : 14,
      "type" : "<IDEOGRAPHIC>",
      "position" : 12
    }
  ]
}
# 安装IK分词器
1.进入es容器中
[root@VM-24-3-centos ~]# docker exec -it 79d386cecbb5 /bin/bash
2.安装IK分词器
elasticsearch@79d386cecbb5:~$ ./bin/elasticsearch-plugin install https://github.com/infinilabs/analysis-ik/releases/download/v8.1.0/elasticsearch-analysis-ik-8.1.0.zip
3.重启es
elasticsearch@79d386cecbb5:~$ exit
[root@VM-24-3-centos ~]# docker restart 79d386cecbb5
4.测试ik分词器
# 测试ik分词器
POST /_analyze
{
  # 最少切分
  "analyzer": "ik_smart",
  "text":"秉持自信而活,世人皆是罪之子"
}

{
  "tokens" : [
    {
      "token" : "秉持",
      "start_offset" : 0,
      "end_offset" : 2,
      "type" : "CN_WORD",
      "position" : 0
    },
    {
      "token" : "自信",
      "start_offset" : 2,
      "end_offset" : 4,
      "type" : "CN_WORD",
      "position" : 1
    },
    {
      "token" : "而",
      "start_offset" : 4,
      "end_offset" : 5,
      "type" : "CN_CHAR",
      "position" : 2
    },
    {
      "token" : "活",
      "start_offset" : 5,
      "end_offset" : 6,
      "type" : "CN_CHAR",
      "position" : 3
    },
    {
      "token" : "世人",
      "start_offset" : 7,
      "end_offset" : 9,
      "type" : "CN_WORD",
      "position" : 4
    },
    {
      "token" : "皆是",
      "start_offset" : 9,
      "end_offset" : 11,
      "type" : "CN_WORD",
      "position" : 5
    },
    {
      "token" : "罪",
      "start_offset" : 11,
      "end_offset" : 12,
      "type" : "CN_CHAR",
      "position" : 6
    },
    {
      "token" : "之子",
      "start_offset" : 12,
      "end_offset" : 14,
      "type" : "CN_WORD",
      "position" : 7
    }
  ]
}

# 测试ik分词器
POST /_analyze
{
  # 最细切分
  "analyzer": "ik_max_word",
  "text":"秉持自信而活,世人皆是罪之子"
}

{
  "tokens" : [
    {
      "token" : "秉持",
      "start_offset" : 0,
      "end_offset" : 2,
      "type" : "CN_WORD",
      "position" : 0
    },
    {
      "token" : "自信",
      "start_offset" : 2,
      "end_offset" : 4,
      "type" : "CN_WORD",
      "position" : 1
    },
    {
      "token" : "而",
      "start_offset" : 4,
      "end_offset" : 5,
      "type" : "CN_CHAR",
      "position" : 2
    },
    {
      "token" : "活",
      "start_offset" : 5,
      "end_offset" : 6,
      "type" : "CN_CHAR",
      "position" : 3
    },
    {
      "token" : "世人",
      "start_offset" : 7,
      "end_offset" : 9,
      "type" : "CN_WORD",
      "position" : 4
    },
    {
      "token" : "皆是",
      "start_offset" : 9,
      "end_offset" : 11,
      "type" : "CN_WORD",
      "position" : 5
    },
    {
      "token" : "罪",
      "start_offset" : 11,
      "end_offset" : 12,
      "type" : "CN_CHAR",
      "position" : 6
    },
    {
      "token" : "之子",
      "start_offset" : 12,
      "end_offset" : 14,
      "type" : "CN_WORD",
      "position" : 7
    }
  ]
}
# 配置扩展词字典
1.进入es容器
[root@VM-24-3-centos ~]# docker exec -it 79d386cecbb5 /bin/bash
2.切换到ik分词器目录
elasticsearch@79d386cecbb5:~$ cd /usr/share/elasticsearch/plugins/.installing-7703281305028211551/config
3.修改配置文件,添加扩展词配置文件
elasticsearch@79d386cecbb5:~/plugins/.installing-7703281305028211551/config$ cat IKAnalyzer.cfg.xml
<?xml version="1.0" encoding="UTF-8"?>
<!DOCTYPE properties SYSTEM "http://java.sun.com/dtd/properties.dtd">
<properties>
        <comment>IK Analyzer 扩展配置</comment>
        <!--用户可以在这里配置自己的扩展字典 -->
        <entry key="ext_dict">ext.dic</entry>
         <!--用户可以在这里配置自己的扩展停止词字典-->
        <entry key="ext_stopwords">stopword.dic</entry>
</properties>
# 查看扩展词
elasticsearch@79d386cecbb5:~/plugins/.installing-7703281305028211551/config$ cat ext.dic
罪之子
4.重启es使修改生效
[root@VM-24-3-centos ~]# docker restart 79d386cecbb5
5.验证修改是否生效
# 测试ik分词器
POST /_analyze
{
  "analyzer": "ik_smart",
  "text":"秉持自信而活,世人皆是罪之子"
}

{
  "tokens" : [
    {
      "token" : "秉持",
      "start_offset" : 0,
      "end_offset" : 2,
      "type" : "CN_WORD",
      "position" : 0
    },
    {
      "token" : "自信",
      "start_offset" : 2,
      "end_offset" : 4,
      "type" : "CN_WORD",
      "position" : 1
    },
    {
      "token" : "而",
      "start_offset" : 4,
      "end_offset" : 5,
      "type" : "CN_CHAR",
      "position" : 2
    },
    {
      "token" : "活",
      "start_offset" : 5,
      "end_offset" : 6,
      "type" : "CN_CHAR",
      "position" : 3
    },
    {
      "token" : "世人",
      "start_offset" : 7,
      "end_offset" : 9,
      "type" : "CN_WORD",
      "position" : 4
    },
    {
      "token" : "皆是",
      "start_offset" : 9,
      "end_offset" : 11,
      "type" : "CN_WORD",
      "position" : 5
    },
    {
      # 可以看到修改生效,这个词能检索到了
      "token" : "罪之子",
      "start_offset" : 11,
      "end_offset" : 14,
      "type" : "CN_WORD",
      "position" : 6
    }
  ]
}
# 配置停止词字典
1.进入es容器
[root@VM-24-3-centos ~]# docker exec -it 79d386cecbb5 /bin/bash
2.切换到ik分词器目录
elasticsearch@79d386cecbb5:~$ cd /usr/share/elasticsearch/plugins/.installing-7703281305028211551/config
3.修改配置文件,添加扩展词配置文件
elasticsearch@79d386cecbb5:~/plugins/.installing-7703281305028211551/config$ cat IKAnalyzer.cfg.xml
<?xml version="1.0" encoding="UTF-8"?>
<!DOCTYPE properties SYSTEM "http://java.sun.com/dtd/properties.dtd">
<properties>
        <comment>IK Analyzer 扩展配置</comment>
        <!--用户可以在这里配置自己的扩展字典 -->
        <entry key="ext_dict">ext.dic</entry>
         <!--用户可以在这里配置自己的扩展停止词字典-->
        <entry key="ext_stopwords">stopword.dic</entry>
</properties>

elasticsearch@79d386cecbb5:~$ cd /usr/share/elasticsearch/plugins/.installing-7703281305028211551/config

elasticsearch@79d386cecbb5:~/plugins/.installing-7703281305028211551/config$ cat IKAnalyzer.cfg.xml
<?xml version="1.0" encoding="UTF-8"?>
<!DOCTYPE properties SYSTEM "http://java.sun.com/dtd/properties.dtd">
<properties>
        <comment>IK Analyzer 扩展配置</comment>
        <!--用户可以在这里配置自己的扩展字典 -->
        <entry key="ext_dict">ext.dic</entry>
         <!--用户可以在这里配置自己的扩展停止词字典-->
        <entry key="ext_stopwords">stopword.dic</entry>
</properties>
# 查看停用词汇
elasticsearch@79d386cecbb5:~/plugins/.installing-7703281305028211551/config$ cat stopword.dic
罪
之子
4.重启es使修改生效
[root@VM-24-3-centos ~]# docker restart 79d386cecbb5
5.验证修改是否生效
# 测试ik分词器
POST /_analyze
{
  "analyzer": "ik_smart",
  "text":"秉持自信而活,世人皆是罪之子"
}

{
  "tokens" : [
    {
      # 可以看到,“罪”,“之子”这两个之前无意义的分词已经查询不到了
      "token" : "秉持",
      "start_offset" : 0,
      "end_offset" : 2,
      "type" : "CN_WORD",
      "position" : 0
    },
    {
      "token" : "自信",
      "start_offset" : 2,
      "end_offset" : 4,
      "type" : "CN_WORD",
      "position" : 1
    },
    {
      "token" : "而",
      "start_offset" : 4,
      "end_offset" : 5,
      "type" : "CN_CHAR",
      "position" : 2
    },
    {
      "token" : "活",
      "start_offset" : 5,
      "end_offset" : 6,
      "type" : "CN_CHAR",
      "position" : 3
    },
    {
      "token" : "世人",
      "start_offset" : 7,
      "end_offset" : 9,
      "type" : "CN_WORD",
      "position" : 4
    },
    {
      "token" : "皆是",
      "start_offset" : 9,
      "end_offset" : 11,
      "type" : "CN_WORD",
      "position" : 5
    },
    {
      "token" : "罪之子",
      "start_offset" : 11,
      "end_offset" : 14,
      "type" : "CN_WORD",
      "position" : 6
    }
  ]
}
# 索引库
# 创建索引库
PUT /my_index
{
  "mappings":{
    "properties": {
      "info":{
        "type":"text",
        "analyzer": "ik_smart"
      },
      "email":{
        "type":"keyword",
        "index": false
      }
    }
  }
}
# 执行结果
{
  "acknowledged" : true,
  "shards_acknowledged" : true,
  "index" : "my_index"
}
java代码中创建索引库
1.引入es相关依赖
<dependencies>
  <dependency>
    <groupId>org.elasticsearch.client</groupId>
    <artifactId>elasticsearch-rest-high-level-client</artifactId>
    <version>8.1.0</version>
  </dependency>
</dependencies>
2.初始化RestHighLevelClient对象
RestHighLevelClient client = new RestHighLevelClient(RestClient.builder(HttpHost.create("http://139.199.188.50:9200")));
3.创建索引库
// 创建索引库
CreateIndexRequest indexRequest = new CreateIndexRequest("my_index");
// 设置索引库的Mapping属性
indexRequest.source("mapping_str",XContentType.JSON);
// 发起索引库创建请求,这里的client指的是上一步创建的RestHighLevelClient对象
client.indices().create(indexRequest,RequestOptions.DEFAULT);
# 查询索引库
GET /my_index
# 执行结果
{
  "my_index" : {
    "aliases" : { },
    "mappings" : {
      "properties" : {
        "email" : {
          "type" : "keyword",
          "index" : false
        },
        "info" : {
          "type" : "text",
          "analyzer" : "ik_smart"
        }
      }
    },
    "settings" : {
      "index" : {
        "routing" : {
          "allocation" : {
            "include" : {
              "_tier_preference" : "data_content"
            }
          }
        },
        "number_of_shards" : "1",
        "provided_name" : "my_index",
        "creation_date" : "1725631622678",
        "number_of_replicas" : "1",
        "uuid" : "951nP3GPQ_i5ImlGPVxiLg",
        "version" : {
          "created" : "8010099"
        }
      }
    }
  }
}
java代码中查询索引库
此处省略引入es相关依赖及初始化初始化RestHighLevelClient对象流程。
1.查询索引库
// 查询索引库
GetIndexRequest indexRequest = new GetIndexRequest("my_index");
// 发起索引库查询请求,这里的client指的是上一步创建的RestHighLevelClient对象
boolean exists = client.indices().exist(indexRequest,RequestOptions.DEFAULT);
# 删除索引库
DELETE /my_index

# 执行结果
{
  "acknowledged" : true
}
java代码中删除索引库
此处省略引入es相关依赖及初始化初始化RestHighLevelClient对象流程。
1.删除索引库
// 删除索引库
DeleteIndexRequest indexRequest = new DeleteIndexRequest("my_index");
// 发起索引库删除请求,这里的client指的是上一步创建的RestHighLevelClient对象
client.indices().delete(indexRequest,RequestOptions.DEFAULT);
# 修改索引库
es中索引库不允许修改,可以先查询,再删除,最后重新创建索引。此外,es中允许对现有索引库增加新字段,如下:
PUT /my_index/_mapping
{
 "properties": {
    "introduction":{
      "type":"text",
      "analyzer": "ik_smart"
    }
  }
}

# 执行结果
{
  "acknowledged" : true
}
# 文档
# 创建文档
POST /my_index/_doc/5242f585-d92c-9580-17dd-f2bd4eb82fe5
{
  "info":"howl,30,boy",
  "introduction":"一个乐观的小男孩",
  "email":"504070596@qq.com"
}

# 执行结果
{
  "_index" : "my_index",
  "_id" : "5242f585-d92c-9580-17dd-f2bd4eb82fe5",
  "_version" : 1,
  "result" : "created",
  "_shards" : {
    "total" : 2,
    "successful" : 1,
    "failed" : 0
  },
  "_seq_no" : 0,
  "_primary_term" : 1
}
java代码中新增文档
此处省略引入es相关依赖及初始化初始化RestHighLevelClient对象流程。
1.新增文档
// 新增文档
IndexRequest request = new IndexRequest("my_index").id("1");
// 准备JSON文档
request.source("{\"name\":\"Jack\"}",XContentType.JSON);
// 发送请求
client.index(request,RequestOptions.DEFAULT);
java代码中批量新增文档
此处省略引入es相关依赖及初始化初始化RestHighLevelClient对象流程。
1.批量新增文档
// 批量新增文档
BulkRequest request = new BulkRequest();
// 增加第一条数据
request.add(new IndexRequest("my_index").id("1").source("{\"name\":\"Jack\"}",XContentType.JSON));
// 增加第二条数据
request.add(new IndexRequest("my_index").id("2").source("{\"name\":\"Tony\"}",XContentType.JSON));
// 发送请求
client.bulk(request,RequestOptions.DEFAULT);
# 查询文档
GET /my_index/_doc/5242f585-d92c-9580-17dd-f2bd4eb82fe5

# 执行结果
{
  "_index" : "my_index",
  "_id" : "5242f585-d92c-9580-17dd-f2bd4eb82fe5",
  "_version" : 1,
  "_seq_no" : 0,
  "_primary_term" : 1,
  "found" : true,
  "_source" : {
    "info" : "howl,30,boy",
    "introduction" : "一个乐观的小男孩",
    "email" : "504070596@qq.com"
  }
}
java代码中查询文档
此处省略引入es相关依赖及初始化初始化RestHighLevelClient对象流程。
1.查询文档
// 通过索引名以及文档id查询文档
GetRequest request = new GetRequest("my_index","1");
// 发送请求,获取返回结果
GetResponse response = client.index(request,RequestOptions.DEFAULT);
// 解析返回结果
String str = response.getSourceAsString();
// 输出结果
System.out.println(str);
# 删除文档
DELETE /my_index/_doc/5242f585-d92c-9580-17dd-f2bd4eb82fe5

# 执行结果
{
  "_index" : "my_index",
  "_id" : "5242f585-d92c-9580-17dd-f2bd4eb82fe5",
  "_version" : 2,
  "result" : "deleted",
  "_shards" : {
    "total" : 2,
    "successful" : 1,
    "failed" : 0
  },
  "_seq_no" : 1,
  "_primary_term" : 1
}
java代码中删除文档
此处省略引入es相关依赖及初始化初始化RestHighLevelClient对象流程。
1.删除文档
// 通过索引名以及文档id删除文档
DeleteRequest request = new DeleteRequest("my_index","1");
// 发送请求,执行删除操作
client.delete(request,RequestOptions.DEFAULT);
# 修改文档
# 全量修改
PUT /my_index/_doc/5242f585-d92c-9580-17dd-f2bd4eb82fe5
{
  "info":"howl,30,boy",
  "introduction":"一个乐观的小男孩",
  "email":"504070596@qq.com"
}

# 执行结果
{
  "_index" : "my_index",
  "_id" : "5242f585-d92c-9580-17dd-f2bd4eb82fe5",
  "_version" : 5,
  "result" : "updated",
  "_shards" : {
    "total" : 2,
    "successful" : 1,
    "failed" : 0
  },
  "_seq_no" : 4,
  "_primary_term" : 1
}
# 增量修改
POST /my_index/_update/5242f585-d92c-9580-17dd-f2bd4eb82fe5
{
  "doc":{
    "info":"howl,31,boy"
  }
}

# 执行结果
{
  "_index" : "my_index",
  "_id" : "5242f585-d92c-9580-17dd-f2bd4eb82fe5",
  "_version" : 6,
  "result" : "updated",
  "_shards" : {
    "total" : 2,
    "successful" : 1,
    "failed" : 0
  },
  "_seq_no" : 5,
  "_primary_term" : 1
}
java代码中增量修改文档
此处省略引入es相关依赖及初始化初始化RestHighLevelClient对象流程。
1.修改文档
// 通过索引名以及文档id修改文档
UpdateRequest request = new UpdateRequest("my_index","1");
// 准备参数,每两个参数对应一对key-value
request.doc("age",31,"name","howl");
// 发送请求,执行更新操作
client.update(request,RequestOptions.DEFAULT);
# DSL查询
# 查询所有
# 可以查询出该索引下的所有数据,一般用作测试,不做生产业务使用
GET /my_index/_search
{
  "query":{
    "match_all":{
    }
  }
}

# 执行结果
{
  "took" : 1,
  "timed_out" : false,
  "_shards" : {
    "total" : 1,
    "successful" : 1,
    "skipped" : 0,
    "failed" : 0
  },
  "hits" : {
    "total" : {
      "value" : 1,
      "relation" : "eq"
    },
    "max_score" : 1.0,
    "hits" : [
      {
        "_index" : "my_index",
        "_id" : "5242f585-d92c-9580-17dd-f2bd4eb82fe5",
        "_score" : 1.0,
        "_source" : {
          "info" : "howl,31,boy",
          "introduction" : "一个乐观的小男孩",
          "email" : "504070596@qq.com"
        }
      }
    ]
  }
}
java代码中查询所有文档
此处省略引入es相关依赖及初始化初始化RestHighLevelClient对象流程。
1.查询所有文档
// 准备Request
SearchRequest request = new SearchRequest("my_index");
// 封装DSL语句
request.source().query(QueryBuilders.matchAllQuery());
// 发送请求,获取返回结果
SearchResponse response = client.search(request,RequestOptions.DEFAULT);
// ...解析返回结果
# 全文检索查询
利用分词器对用户输入内容进行分词,然后去倒排索引库中匹配。
# match查询
match查询会对用户输入内容进行分词,然后去倒排索引库查询。
GET /my_index/_search
{
  "query":{
    "match":{
      "introduction":"乐观的小男孩"
    }
  }
}

# 执行结果
{
  "took" : 4,
  "timed_out" : false,
  "_shards" : {
    "total" : 1,
    "successful" : 1,
    "skipped" : 0,
    "failed" : 0
  },
  "hits" : {
    "total" : {
      "value" : 1,
      "relation" : "eq"
    },
    "max_score" : 0.8630463,
    "hits" : [
      {
        "_index" : "my_index",
        "_id" : "5242f585-d92c-9580-17dd-f2bd4eb82fe5",
        "_score" : 0.8630463,
        "_source" : {
          "info" : "howl,31,boy",
          "introduction" : "一个乐观的小男孩",
          "email" : "504070596@qq.com"
        }
      }
    ]
  }
}
java代码中全文检索文档
此处省略引入es相关依赖及初始化初始化RestHighLevelClient对象流程。
1.全文检索文档
// 准备Request
SearchRequest request = new SearchRequest("my_index");
// 封装DSL语句
request.source().query(QueryBuilders.matchQuery("introduction","乐观的小男孩"));
// 发送请求,获取返回结果
SearchResponse response = client.search(request,RequestOptions.DEFAULT);
// ...解析返回结果
# multi_match查询
根据多个字段查询,参与查询字段越多,性能越差。
GET /my_index/_search
{
  "query":{
    "multi_match":{
      "query":"乐观",
      "fields": ["info","introduction"]
    }
  }
}

# 查询结果
{
  "took" : 0,
  "timed_out" : false,
  "_shards" : {
    "total" : 1,
    "successful" : 1,
    "skipped" : 0,
    "failed" : 0
  },
  "hits" : {
    "total" : {
      "value" : 1,
      "relation" : "eq"
    },
    "max_score" : 0.2876821,
    "hits" : [
      {
        "_index" : "my_index",
        "_id" : "5242f585-d92c-9580-17dd-f2bd4eb82fe5",
        "_score" : 0.2876821,
        "_source" : {
          "info" : "howl,31,boy",
          "introduction" : "一个乐观的小男孩",
          "email" : "504070596@qq.com"
        }
      }
    ]
  }
}
# 精准查询
# 根据精确词条值查找数据,一般是查找keyword,数值,日期,boolean等类型值,索引不会对检索条件进行分词。
GET /my_index/_search
{
  "query":{
    # 除了trem查询,我们还可以使用range查询,range会框定查询的范围
    "term":{
      "email":"504070596@qq.com"
    }
  }
}
# 查询结果
{
  "took" : 0,
  "timed_out" : false,
  "_shards" : {
    "total" : 1,
    "successful" : 1,
    "skipped" : 0,
    "failed" : 0
  },
  "hits" : {
    "total" : {
      "value" : 1,
      "relation" : "eq"
    },
    "max_score" : 1.0,
    "hits" : [
      {
        "_index" : "my_index",
        "_id" : "5242f585-d92c-9580-17dd-f2bd4eb82fe5",
        "_score" : 1.0,
        "_source" : {
          "info" : "howl,31,boy",
          "introduction" : "一个乐观的小男孩",
          "email" : "504070596@qq.com"
        }
      }
    ]
  }
}
java代码中精准查询文档
此处省略引入es相关依赖及初始化初始化RestHighLevelClient对象流程。
1.termQuery
// 准备Request
SearchRequest request = new SearchRequest("my_index");
// 封装DSL语句
request.source().query(QueryBuilders.termQuery("email","504070596@qq.com"));
// 发送请求,获取返回结果
SearchResponse response = client.search(request,RequestOptions.DEFAULT);
// ...解析返回结果
2.rangeQuery
// 准备Request
SearchRequest request = new SearchRequest("my_index");
// 封装DSL语句
request.source().query(QueryBuilders.rangeQuery("price").gte(100).lte(150));
// 发送请求,获取返回结果
SearchResponse response = client.search(request,RequestOptions.DEFAULT);
// ...解析返回结果
# 复合查询
复合查询可以将其他简单查询组合起来,实现更复杂的搜索逻辑。如算分函数查询function score,
# 算分函数查询
可以控制文档相关性算分,控制文档排名。
GET /my_index/_search
{
  "query": {
    "function_score": {
      # 原始的查询条件
      "query": {
        "match": {
          "introduction": "乐观的小男孩"
        }
      },
      "functions": [
        {
          # 过滤条件,符合条件的才会被重新算分
          "filter": {
            "term": {
              "id": "5242f585-d92c-9580-17dd-f2bd4eb82fe5"
            }
          },
          # 算分函数,算分函数的结果称为function score,给定一个常量值作为算分结果,将来会与query score运算,得到新算分
          "weight": 10
        }
      ],
      # 加权模式,定义function score与query score的运算方式,multiply表示两者相乘,replace表示用function score替换掉query score
      "boost_mode": "multiply"
    }
  }
}

# 执行结果
{
  "took" : 122,
  "timed_out" : false,
  "_shards" : {
    "total" : 1,
    "successful" : 1,
    "skipped" : 0,
    "failed" : 0
  },
  "hits" : {
    "total" : {
      "value" : 1,
      "relation" : "eq"
    },
    "max_score" : 0.8630463,
    "hits" : [
      {
        "_index" : "my_index",
        "_id" : "5242f585-d92c-9580-17dd-f2bd4eb82fe5",
        "_score" : 0.8630463,
        "_source" : {
          "info" : "howl,30,boy",
          "introduction" : "一个乐观的小男孩",
          "email" : "504070596@qq.com"
        }
      }
    ]
  }
}
# 布尔查询
布尔查询是一个或多个查询子句的组合。子查询的组合方式有must(必须匹配每个子查询),should(选择性匹配子查询),must_not(必须不匹配,不参与算分),filter(必须匹配,不参与算分)。
GET /my_index/_search
{
  "query": {
    "bool": {
      "must": [
        {
          "term": {
            "introduction": "乐观"
          }
        }
      ],
      "should": [
        {
          "term": {
            "introduction": "小男孩"
          }
        }
      ]
    }
  }
}
# 查询结果
{
  "took" : 2,
  "timed_out" : false,
  "_shards" : {
    "total" : 1,
    "successful" : 1,
    "skipped" : 0,
    "failed" : 0
  },
  "hits" : {
    "total" : {
      "value" : 1,
      "relation" : "eq"
    },
    "max_score" : 0.5753642,
    "hits" : [
      {
        "_index" : "my_index",
        "_id" : "5242f585-d92c-9580-17dd-f2bd4eb82fe5",
        "_score" : 0.5753642,
        "_source" : {
          "info" : "howl,30,boy",
          "introduction" : "一个乐观的小男孩",
          "email" : "504070596@qq.com"
        }
      }
    ]
  }
}
java代码中bool查询
此处省略引入es相关依赖及初始化初始化RestHighLevelClient对象流程。
1.bool查询文档
// 准备Request
SearchRequest request = new SearchRequest("my_index");
// 创建bool查询
BoolQueryBuilder boolQuery = QueryBuilders.boolQuery();
// 添加must条件
boolQuery.must(QueryBuilders.termQuery("city","杭州"));
// 封装DSL语句
request.source().query(boolQuery);
// 发送请求,获取返回结果
SearchResponse response = client.search(request,RequestOptions.DEFAULT);
// ...解析返回结果
# 查询结果排序
GET /my_index/_search
{
  "query":{
    "term":{
      "email":"504070596@qq.com"
    }
  },
  "sort": [
    {
      "email": {
        "order": "desc"
      }
    }
  ]
}
# 查询结果
{
  "took" : 0,
  "timed_out" : false,
  "_shards" : {
    "total" : 1,
    "successful" : 1,
    "skipped" : 0,
    "failed" : 0
  },
  "hits" : {
    "total" : {
      "value" : 1,
      "relation" : "eq"
    },
    "max_score" : null,
    "hits" : [
      {
        "_index" : "my_index",
        "_id" : "5242f585-d92c-9580-17dd-f2bd4eb82fe5",
        "_score" : null,
        "_source" : {
          "info" : "howl,31,boy",
          "introduction" : "一个乐观的小男孩",
          "email" : "504070596@qq.com"
        },
        "sort" : [
          "504070596@qq.com"
        ]
      }
    ]
  }
}
java代码中对查询结果排序
此处省略引入es相关依赖及初始化初始化RestHighLevelClient对象流程。
1.查询结果排序
// 准备Request
SearchRequest request = new SearchRequest("my_index");
// 封装DSL语句
request.source().query(QueryBuilders.matchQuery("introduction","乐观的小男孩"));
// 排序
request.source().sort("price",SortOrder.ASC);
// 发送请求,获取返回结果
SearchResponse response = client.search(request,RequestOptions.DEFAULT);
// ...解析返回结果
# 查询结果分页
GET /my_index/_search
{
  "query":{
    "term":{
      "email":"504070596@qq.com"
    }
  },
  "from":0,
  "size":20,
  "sort": [
    {
      "email": {
        "order": "desc"
      }
    }
  ]
}
# 默认的分页参数是10条数据一页,可以进行修改
{
  "took" : 0,
  "timed_out" : false,
  "_shards" : {
    "total" : 1,
    "successful" : 1,
    "skipped" : 0,
    "failed" : 0
  },
  "hits" : {
    "total" : {
      "value" : 1,
      "relation" : "eq"
    },
    "max_score" : null,
    "hits" : [
      {
        "_index" : "my_index",
        "_id" : "5242f585-d92c-9580-17dd-f2bd4eb82fe5",
        "_score" : null,
        "_source" : {
          "info" : "howl,31,boy",
          "introduction" : "一个乐观的小男孩",
          "email" : "504070596@qq.com"
        },
        "sort" : [
          "504070596@qq.com"
        ]
      }
    ]
  }
}
java代码中对查询结果分页
此处省略引入es相关依赖及初始化初始化RestHighLevelClient对象流程。
1.查询结果分页
// 准备Request
SearchRequest request = new SearchRequest("my_index");
// 封装DSL语句
request.source().query(QueryBuilders.matchQuery("introduction","乐观的小男孩"));
// 分页
request.source().from(0).size(5);
// 发送请求,获取返回结果
SearchResponse response = client.search(request,RequestOptions.DEFAULT);
// ...解析返回结果
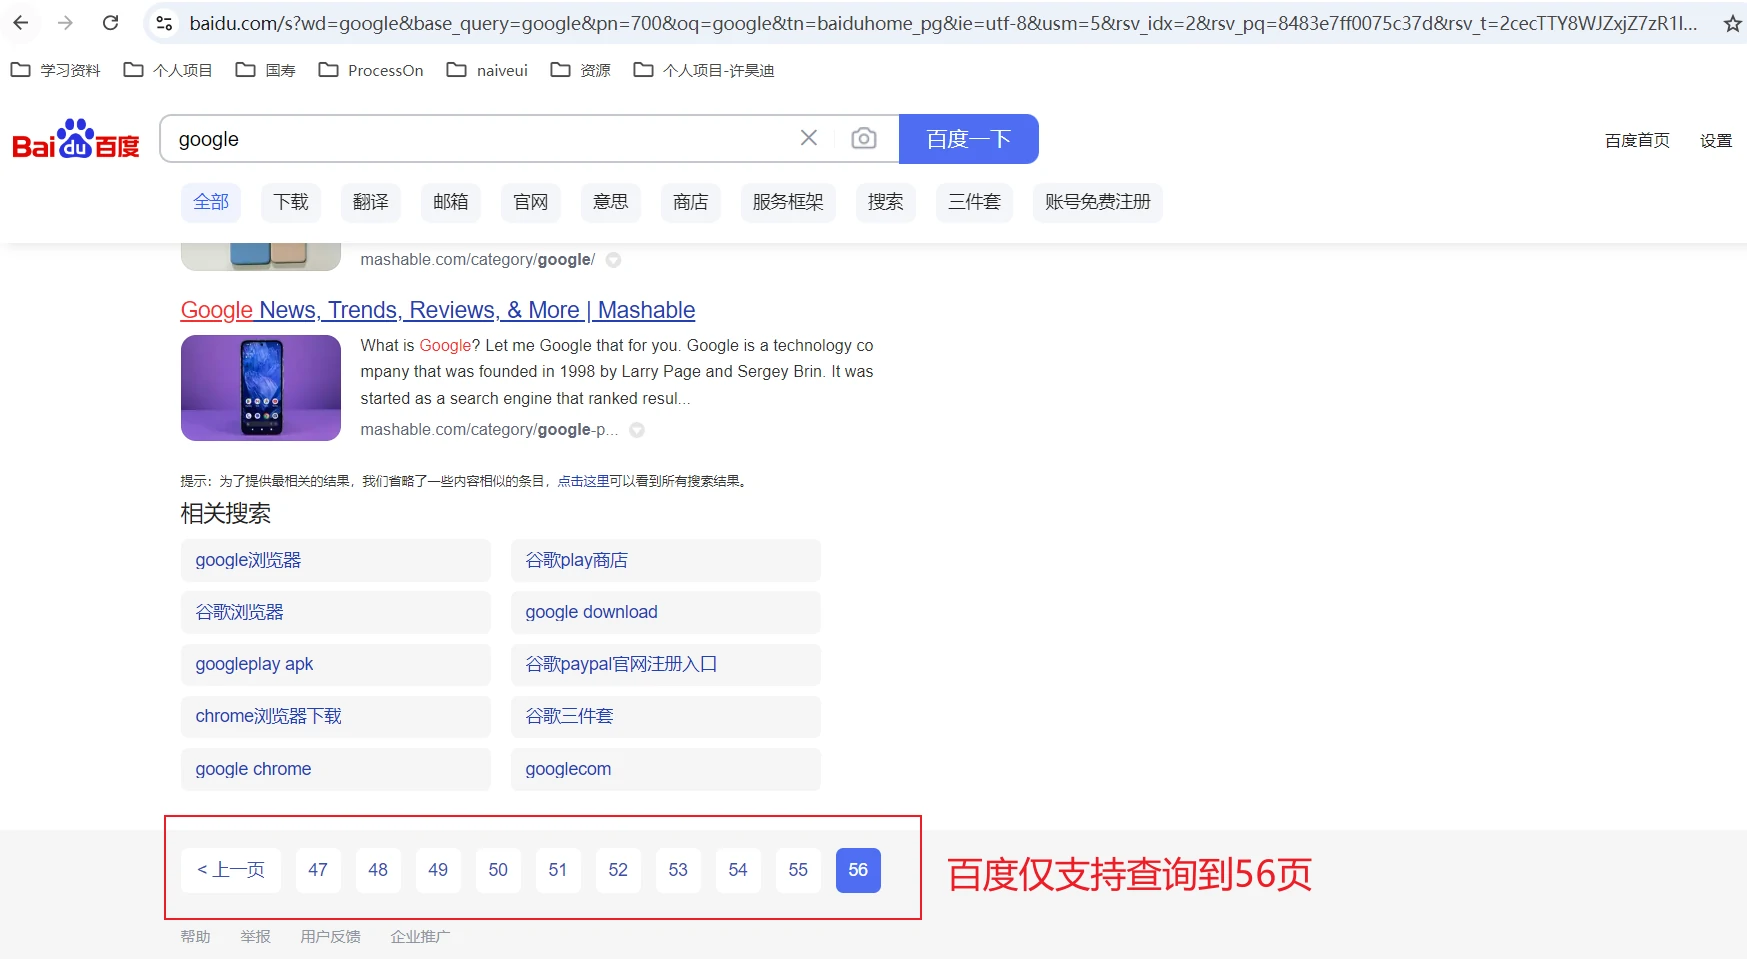
ES中深度分页问题
ES天生支持集群,在集群环境下,我们会面临深度分页问题,如对查询结果根据价格排序,查询第50到60条数据,那么就需要把集群中每台机器的前面60条数据找出来,然后进行归并排序后再找到第50到60条数据。
考虑类似的情况,ES默认仅支持查询10000条数据。(像百度,京东等大型互联网应用也有类似问题,都是通过限制查询总数来解决的)
# 查询结果高亮显示
GET /my_index/_search
{
  "query":{
    "match":{
      "introduction":"乐观的小男孩"
    }
  },
  "from":0,
  "size":20,
  "sort": [
    {
      "email": {
        "order": "desc"
      }
    }
  ],
  "highlight": {
    "fields": {
      "introduction": {
        "pre_tags": "<em>",
        "post_tags": "</em>"
      }
    }
  }
}
# 查询结果
{
  "took" : 1,
  "timed_out" : false,
  "_shards" : {
    "total" : 1,
    "successful" : 1,
    "skipped" : 0,
    "failed" : 0
  },
  "hits" : {
    "total" : {
      "value" : 1,
      "relation" : "eq"
    },
    "max_score" : null,
    "hits" : [
      {
        "_index" : "my_index",
        "_id" : "5242f585-d92c-9580-17dd-f2bd4eb82fe5",
        "_score" : null,
        "_source" : {
          "info" : "howl,31,boy",
          "introduction" : "一个乐观的小男孩",
          "email" : "504070596@qq.com"
        },
        "highlight" : {
          "introduction" : [
            "一个<em>乐观</em><em>的</em><em>小男孩</em>"
          ]
        },
        "sort" : [
          "504070596@qq.com"
        ]
      }
    ]
  }
}
java代码中对查询结果高亮显示
此处省略引入es相关依赖及初始化初始化RestHighLevelClient对象流程。
1.查询结果高亮显示
// 准备Request
SearchRequest request = new SearchRequest("my_index");
// 封装DSL语句
request.source().query(QueryBuilders.matchQuery("introduction","乐观的小男孩"));
// 高亮显示
request.source().highlighter(
  new HighLighterBuilder().
    field("name").
    // 是否需要与查询字段匹配
    requireFieldMatch(false)
);
// 发送请求,获取返回结果
SearchResponse response = client.search(request,RequestOptions.DEFAULT);
// ...解析返回结果,需要特别注意,针对高亮字段,我们需要从结果里拿到highlight属性,这里才是对应的高亮结果
# 数据聚合
聚合指的是对数据进行汇总分析。ES中有三类聚合,分别是Bucket聚合(桶聚合),Metrics聚合(度量聚合,如求平均值,最大值等)以及Pipline管道聚合(类似linux中的pipline | ,基于其他聚合结果再做聚合)。参与聚合的字段必须是keyword,bool,日期类型。
# Bucket聚合
GET /my_index/_search
{
  "size":0, //定义size为0,结果中不包含文档,只包含聚合结果
  "aggs":{// 定义聚合
    "brandAgg":{// 给聚合起个名字
      "terms":{ // 聚合的类型
        "field": "brand", //参与聚合的字段
        "size" : 20 // 希望获取的聚合结果数量
      }
    }
  }
}
java代码实现Bucket聚合
此处省略引入es相关依赖及初始化初始化RestHighLevelClient对象流程。
1.Bucket聚合
// 准备Request
SearchRequest request = new SearchRequest("my_index");
// 封装DSL语句
request.source().size(0);
// 封装DSL语句
request.source().aggregation(
  AggregationBuilders
    .terms("brand_agg")
    .field("brand")
    .size(20);
);
// 发送请求,获取返回结果
SearchResponse response = client.search(request,RequestOptions.DEFAULT);
// ...解析返回结果,需要特别注意,针对聚合结果接下,我们需要从结果的对应位置获取数据
# Metrics聚合
GET /my_index/_search
{
  "size":0, //定义size为0,结果中不包含文档,只包含聚合结果
  "aggs":{// 定义聚合
    "brandAgg":{// 给聚合起个名字
      "terms":{ // 聚合的类型
        "field": "brand", //参与聚合的字段
        "size" : 20 // 希望获取的聚合结果数量
      },
      "aggs": { // barnd聚合的子聚合,也就是分组后对每组分别计算
        "score_stats" : { // 聚合名称
          "stats":{ // 聚合类型,这里可以设置min,max,avg等
            "field":"score" // 聚合字段,这里是score
          }
        }
      }
    }
  }
}
# 自动补全
# 拼音分词器
安装Pinyin Analysis Plugin即可,插件安装方式与IK中文分词器类似。同样的安装完成后,我们可以通过analyze进行验证:
# 测试pinyin分词器,需要注意,拼音分词器仅支持拼音,不支持中文。
POST /_analyze
{
  "analyzer": "pinyin",
  "text":"秉持自信而活,世人皆是罪之子"
}
# 自定义分词器
字段在创建倒排索引的时候使用自定义分词器,在检索时使用ik_smart分词器。相关索引库创建语句如下:
PUT /my_index
{
  "settings": {
    "analysis": {
      "analyzer" : {
        "my_analyzer": {
          "tokenizer":"ik_max_word","filter":"py"
        }
      }
    }
  },
  "mappings": {
    "properties": {
      "name": {
        "type":"text",
        "analyzer" : "my_analyzer", // 在创建倒排索引的时候使用自定义分词器
        "search_analyer": "ik_smart" // 在检索时使用ik_smart分词器
      }
    }
  }
}
# 自动补全查询
1.创建索引库
POST test
{
  "mappings":{
    "properties": {
      "title":{
        "type":"completion"
      }
    }
  }
}
2.索引库中添加文档
POST test/_doc
{
  "title":["Honor","K30"]
}
3.自动补全查询
GET test/_search
{
  "suggest": {
    "title_suggest": {
      "text":"s", //关键字
      "completion": {
        "field": "text",// 补全查询的字段
        "skip_duplicates" : true, //跳过重复的
        "size":10 // 获取前10条结果
      }
    }
  }
}
# MySQL与ES的数据同步
通过引入MQ,实现MySQL与ES的数据同步。这里无需过多介绍。
# ES集群
# ES集群搭建
1.节点1配置
docker run -d \
--name=es_node_1 \
--restart=always \
-p 9201:9200 \
-p 9301:9300 \
--privileged=true \
-v /usr/local/es_cluster/node_1/data:/usr/share/elasticsearch/data \
-v /usr/local/es_cluster/node_1/logs:/usr/share/elasticsearch/logs \
-v /usr/local/es_cluster/node_1/plugins:/usr/share/elasticsearch/plugins \
-e "cluster.name=my-cluster" \
-e "node.name=node-1" \
-e "node.master=true" \
-e "node.data=true" \
-e "network.host=0.0.0.0" \
-e "transport.tcp.port=9300" \
-e "http.port=9200" \
-e "cluster.initial_master_nodes=node-1" \
-e "discovery.seed_hosts=192.168.1.100:9301,192.168.1.100:9302,192.168.1.100:9303" \
-e "gateway.auto_import_dangling_indices=true" \
-e "http.cors.enabled=true" \
-e "http.cors.allow-origin=*" \
-e "ES_JAVA_OPTS=-Xms512m -Xmx512m" \
-e "TAKE_FILE_OWNERSHIP=true" \
elasticsearch:7.9.3

# 各环境变量业务含义说明
cluster.name:配置es集群名称,默认为elasticsearch,同一网段下的不同ES集群通过集群名来区分;
node.name:节点名称,一个或多个节点组成一个cluster集群,集群是一个逻辑的概念,节点是物理概念
node.master:是否可以成为master节点
node.data:是否允许该节点存储数据,默认开启
network.host:绑定主机的ip地址,允许外网访问,同一网段下的ES会自动加入该集群中
transport.tcp.port:设置集群节点之间交互的tcp端口
http.port:设置http端口
cluster.initial_master_nodes:设置哪些ES节点参与第一次master节点选举,其值可以是ES节点IP地址(如:192.168.1.100或192.168.1.100:9300),也可以是ES节点名称
discovery.seed_hosts:设置当前节点与哪些ES节点建立连接,其值可以是127.0.0.1
gateway.auto_import_dangling_indices:是否自动引入dangling索引,默认false
#支持跨域访问:kibana或elasticsearch-head插件作为客户端要连接ES服务(http://192.168.1.100:9200),此时存在跨域问题,elasticsearch默认不允许跨域访问
http.cors.enabled:开启cors跨域访问支持,默认为false
http.cors.allow-origin:跨域访问允许的域名地址:允许所有域名
ES_JAVA_OPTS=-Xms512m -Xmx512m:ES使用Java语言开发,默认jvm为2G,这里通过ES_JAVA_OPTS设置jvm最大最小内存。
2.节点2配置
docker run -d \
--name=es_node_2 \
--restart=always \
-p 9202:9200 \
-p 9302:9300 \
--privileged=true \
-v /usr/local/es_cluster/node_2/data:/usr/share/elasticsearch/data \
-v /usr/local/es_cluster/node_2/logs:/usr/share/elasticsearch/logs \
-v /usr/local/es_cluster/node_2/plugins:/usr/share/elasticsearch/plugins \
-e "cluster.name=my-cluster" \
-e "node.name=node-2" \
-e "node.master=true" \
-e "node.data=true" \
-e "network.host=0.0.0.0" \
-e "transport.tcp.port=9300" \
-e "http.port=9200" \
-e "discovery.seed_hosts=192.168.1.100:9301,192.168.1.100:9302,192.168.1.100:9303" \
-e "gateway.auto_import_dangling_indices=true" \
-e "http.cors.enabled=true" \
-e "http.cors.allow-origin=*" \
-e "ES_JAVA_OPTS=-Xms512m -Xmx512m" \
-e "TAKE_FILE_OWNERSHIP=true" \
elasticsearch:7.9.3
3.节点3配置
docker run -d \
--name=es_node_3 \
--restart=always \
-p 9203:9200 \
-p 9303:9300 \
--privileged=true \
-v /usr/local/es_cluster/node_3/data:/usr/share/elasticsearch/data \
-v /usr/local/es_cluster/node_3/logs:/usr/share/elasticsearch/logs \
-v /usr/local/es_cluster/node_3/plugins:/usr/share/elasticsearch/plugins \
-e "cluster.name=my-cluster" \
-e "node.name=node-3" \
-e "node.master=true" \
-e "node.data=true" \
-e "network.host=0.0.0.0" \
-e "transport.tcp.port=9300" \
-e "http.port=9200" \
-e "discovery.seed_hosts=192.168.1.100:9301,192.168.1.100:9302,192.168.1.100:9303" \
-e "gateway.auto_import_dangling_indices=true" \
-e "http.cors.enabled=true" \
-e "http.cors.allow-origin=*" \
-e "ES_JAVA_OPTS=-Xms512m -Xmx512m" \
-e "TAKE_FILE_OWNERSHIP=true" \
elasticsearch:7.9.3
# 集群状态监控
kibana默认只能访问集群的某一个节点,如果需要kibana支持ES集群访问,需要做很多配置,因此我们使用cerebro来监控ES集群的状态,cerebro的使用非常简单,只需解压缩即可使用。默认情况下登录后,需要输入ES集群中任一节点的地址,cerebro即可监控该节点所对应的ES集群。
# 在集群中对索引库进行分片
PUT /my_index
{
  "settings": {
    "number_of_shards":3,//分片数量
    "number_of_replicas":1//每个分片的备份的数量
  },
  "mappings": {
    "properties": {
      "name": {
        "type":"text",
        "analyzer" : "my_analyzer", // 在创建倒排索引的时候使用自定义分词器
        "search_analyer": "ik_smart" // 在检索时使用ik_smart分词器
      }
    }
  }
}
# ES集群的节点角色
| 节点类型 | 配置参数 | 默认值 | 节点职责 |
|---|---|---|---|
| master eligible | node.master | true | 备选主节点:主节点可以管理和记录集群状态,决定分片在哪个节点,处理创建和删除索引库的请求 |
| data | node.data | true | 数据节点:存储数据,搜索,聚合,增删改查 |
| ingest | node.ingest | true | 数据存储之前的预处理 |
| coordinating | 以上三个参数都为false,则为coordinating | 无 | 路由请求到其他节点,合并其他节点处理的结果,返回给用户 |
# 什么是脑裂,ES如何规避
# 什么是脑裂
假定有3台机器的ES集群,A机器为主,B,C机器为从,当A与B,C之间通信网络出现问题(A机器并没有宕机),此时B,C会有一台机器成为主,当网络恢复后,集群中就有两个主节点,且都写入了数据,此时就出现了脑裂问题。
# 如何规避脑裂
ES规避脑裂的方式也很简单,在重选主节点的时候进行投票,只有投票数超过(节点数+1)/2,才能当选,如3台机器,主节点异常,另外2台机器的选举票数需要超过(3+1)/2,即超过2(包含2)台机器,因此,A节点会自动降级,禁止相关写操作,B或C机器会有一台机器成为主节点,等网络恢复后,A变成从节点加入到BC构成的主从集群中。
# 如何查看ES中有哪些索引?涉及索引重建,如何确认是否完成?
- 通过ES的API可以查看ES中都有哪些索引。
- 涉及索引重建,通过查询API不加条件可以查询到当前索引中有多少文档document,索引重建后的document应和索引重建前接近。